Using VMware Paravirtual devices
One of the most common oversights in vSphere deployments is a failure to use the Paravirtual drivers that VMware has provided us for networking and storage.
On a physical platform, one chooses supported device(s) for networking and storage, and then installs the correct driver(s) to support those devices. For example; on a physical system, you might specify LSI SAS for storage and Intel E1000 NIC’s for network. That particular combination is, in fact, so common that Operating Systems like Windows have the drivers for those devices pre-installed so they will be recognized both during and after installation. The ‘during’ part is particularly important too, because if the storage driver is not present at the time of install, the hard disk will not be recognized, and the installation fails!
On a virtual platform, it’s a completely different story. Even if the host ESXi server actually has LSI SAS storage adapters and Intel E1000E NIC’s, there is no correlation to the network and storage device for Virtual Machines. In fact, if you choose LSI or Intel (they are the default choices for Windows Server VM builds), the only potential benefit will be that Windows includes those drivers by default. You will, in fact, be emulating the corresponding physical devices by LSI and Intel, with resulting loss of performance!
The only true native storage and network devices for vSphere VMs are the VMware Paravirtual SCSI ( pvscsi ) and Network ( vmxnet3 ) device types and corresponding drivers. Problem is; while Linux distros (most all of them) will include support for Paravirtual devices by default, Microsoft is not so magnanimous. Users choosing to use either (or both) of the VMware Paravirtual device types, will have to install the corresponding drivers.
In most cases, VMware Paravirtual devices are supported for installation in Windows Family 5 (Server 2003, XP) and later, and natively supported by most Linux OS.
Benefits of using VMware Paravirtual SCSI and Network devices include:
- Better data integrity[1] as compared to Intel E1000e
- Reduced CPU Usage within the Guest
- Increased Throughput
- Less Overhead
- Better overall performance
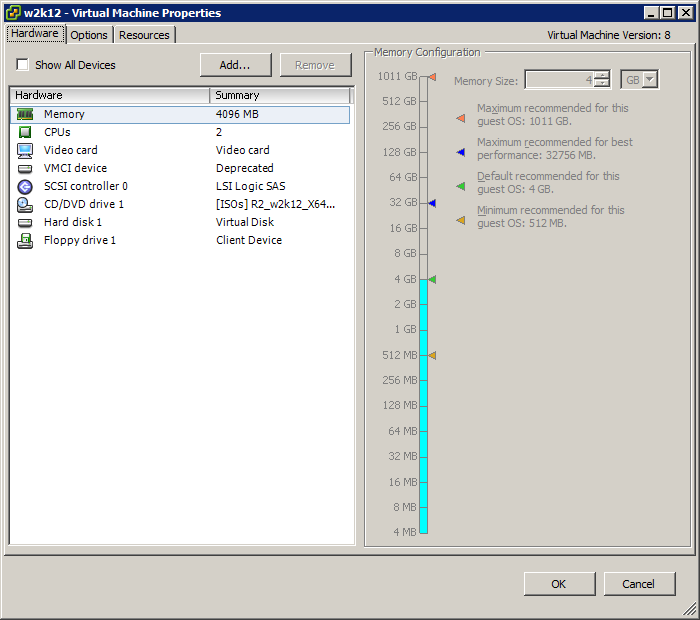
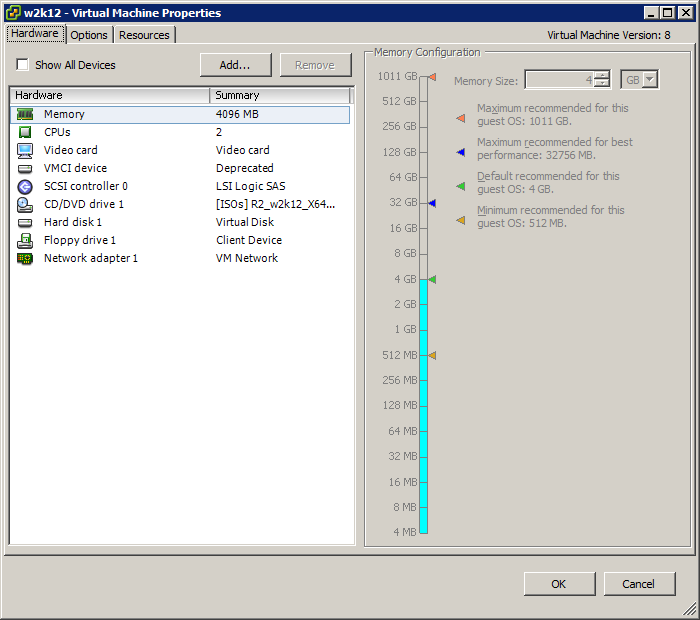
I have created an example Windows Server 2012 R2 VM using only the default E100e and LSI SAS device types and I am going to show you how easy it is to convert from the default (emulated physical) to VMware Paravirtual drivers. For the following steps to work, the VMware Tools must be installed in the VM which is being updated.
Upgrading a VM to vmxnet3 Paravirtual Network Adapter
During the following procedures, it is important to use the Virtual Machine Remote Console (as opposed to RDP) because we will be causing a momentary disconnection from the network.
The biggest challenge is that the static IP address, if assigned, is associated with the device and not with the VM. Therefore, when you upgrade to the vmxnet3 adapter, your challenge will be un-installing and eliminating any trace of the “old” NIC to avoid seeing the dreaded message: “The IP address XXX.XXX.XXX.XXX you have entered for this network adapter is already assigned to another adapter[2]”
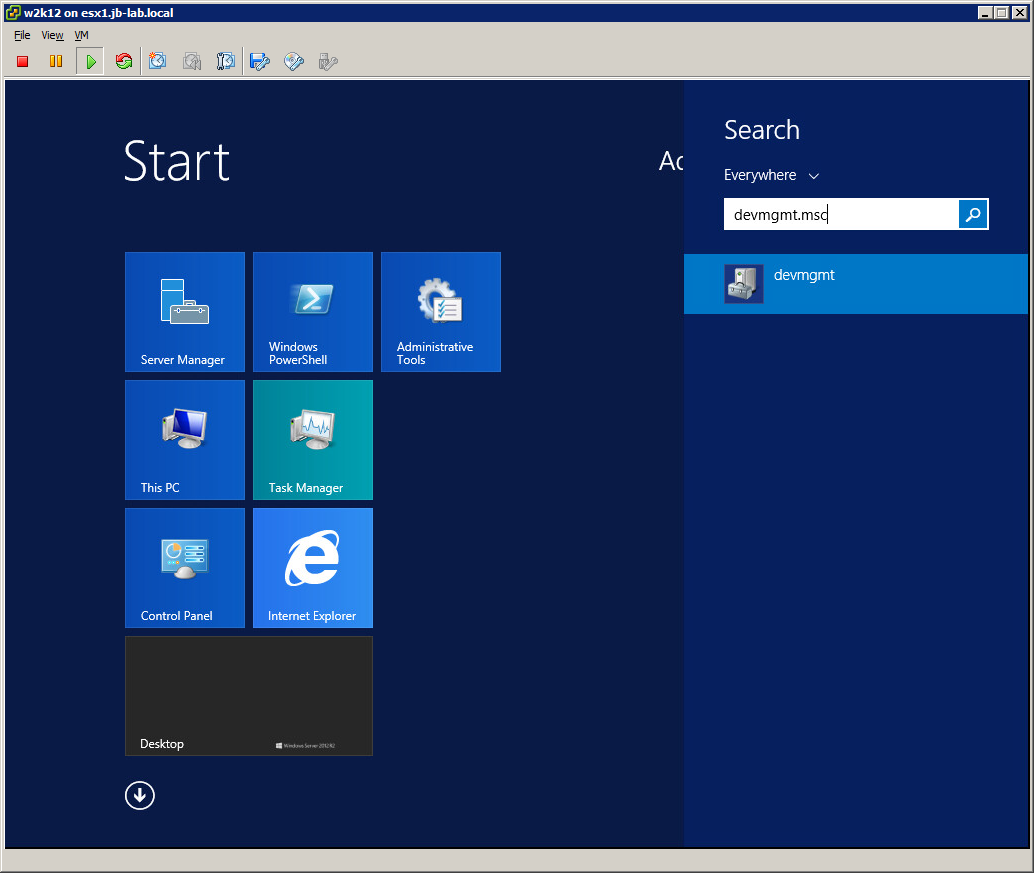
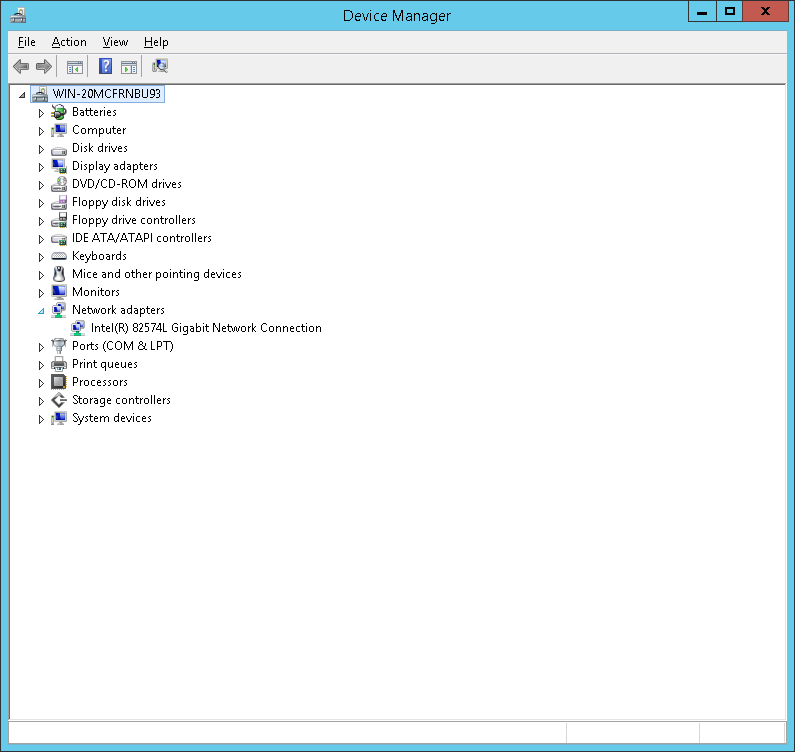
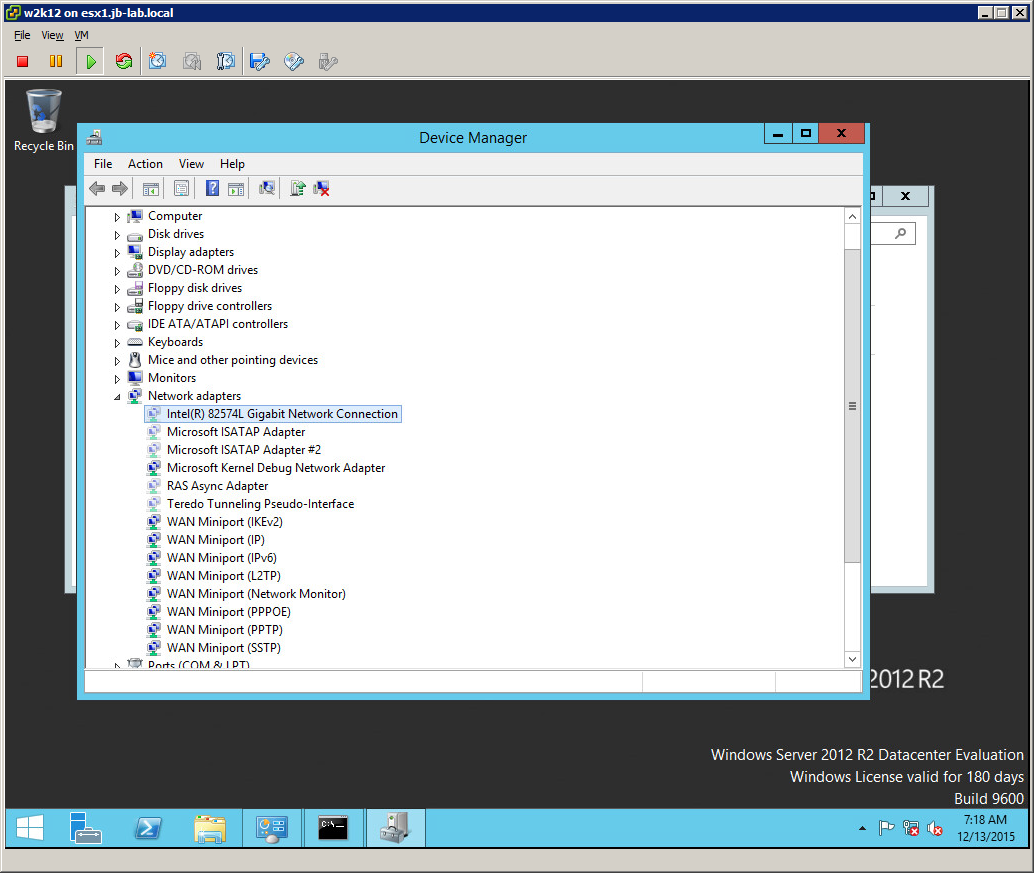
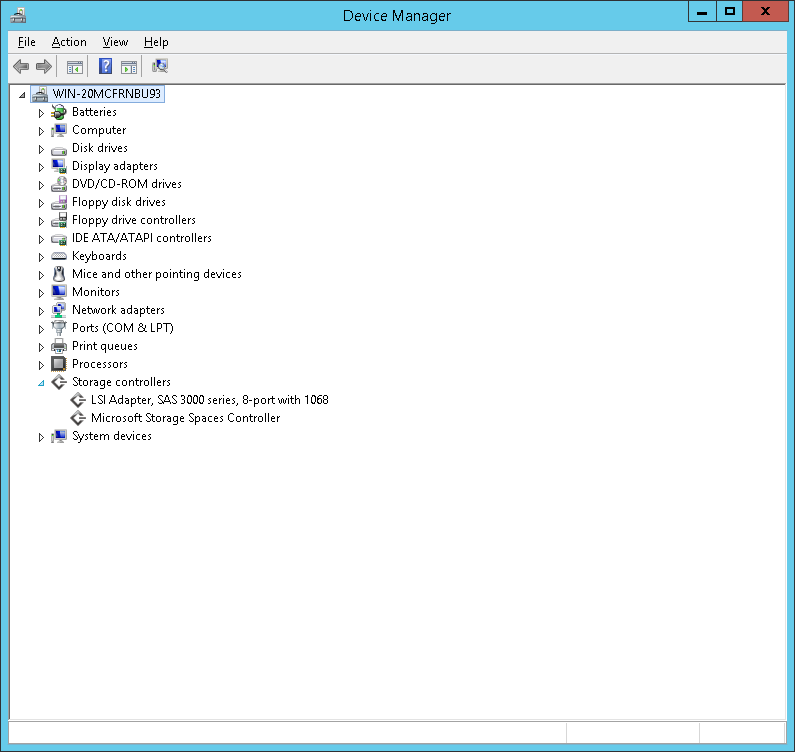
Using the VMRC, log in to your Windows VM and run the device manager with: devmgmt.msc
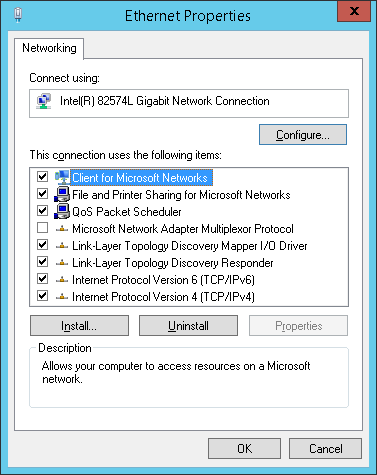
You will see that the Network adapter is clearly listed as an Intel
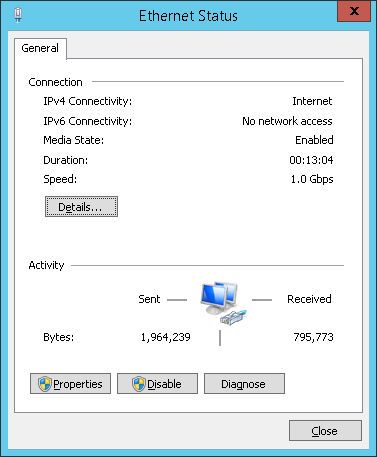
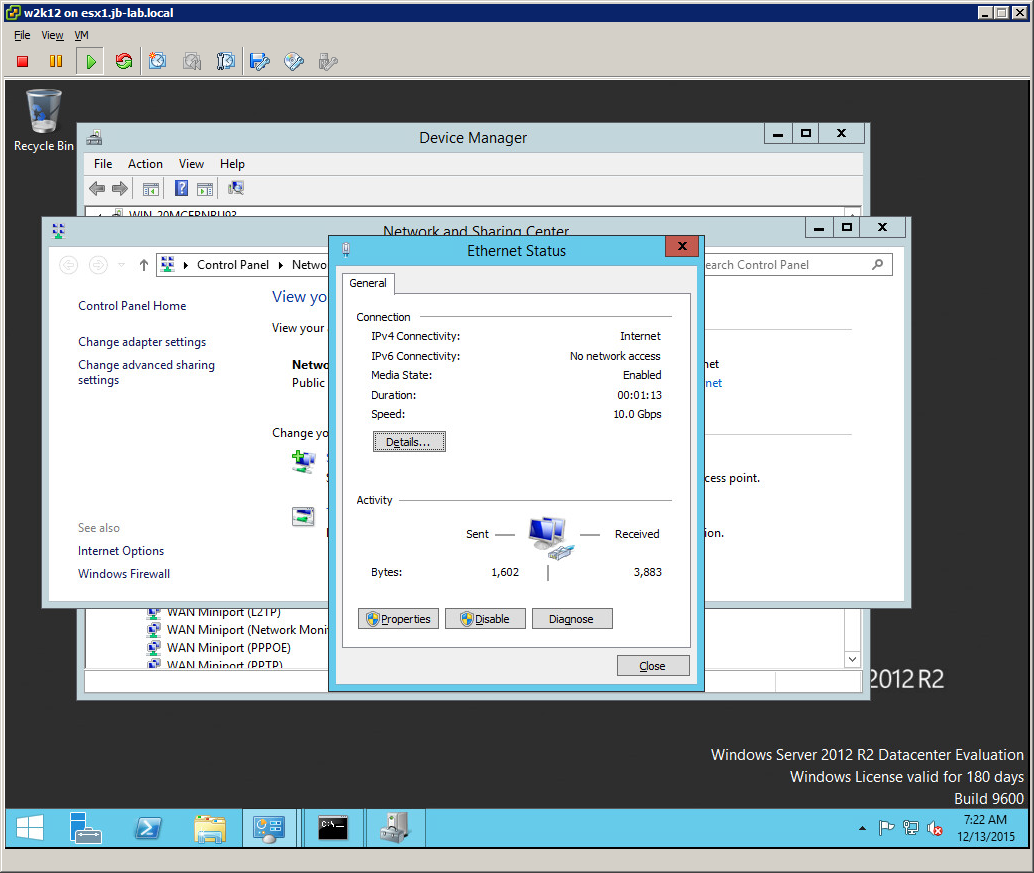
Now go to the Network and Sharing Center and click on any (all) of the active Networks to observe their settings
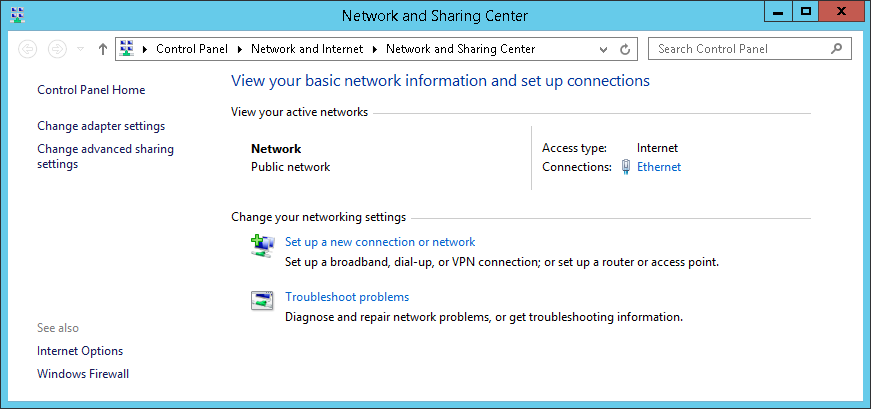
You will notice that the speed is clearly 1.0 Gbps
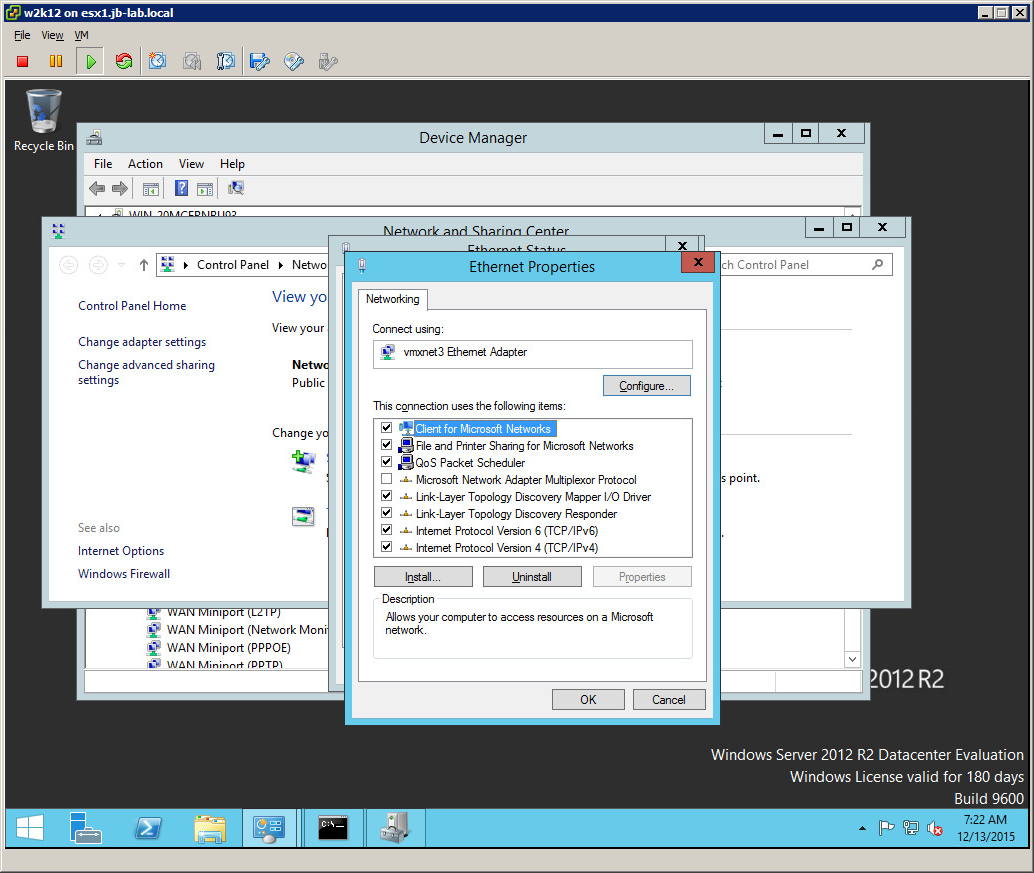
Click on: Properties
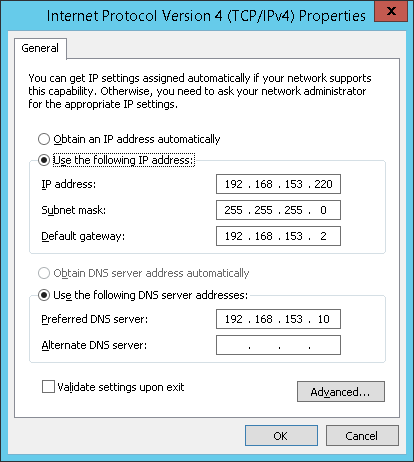
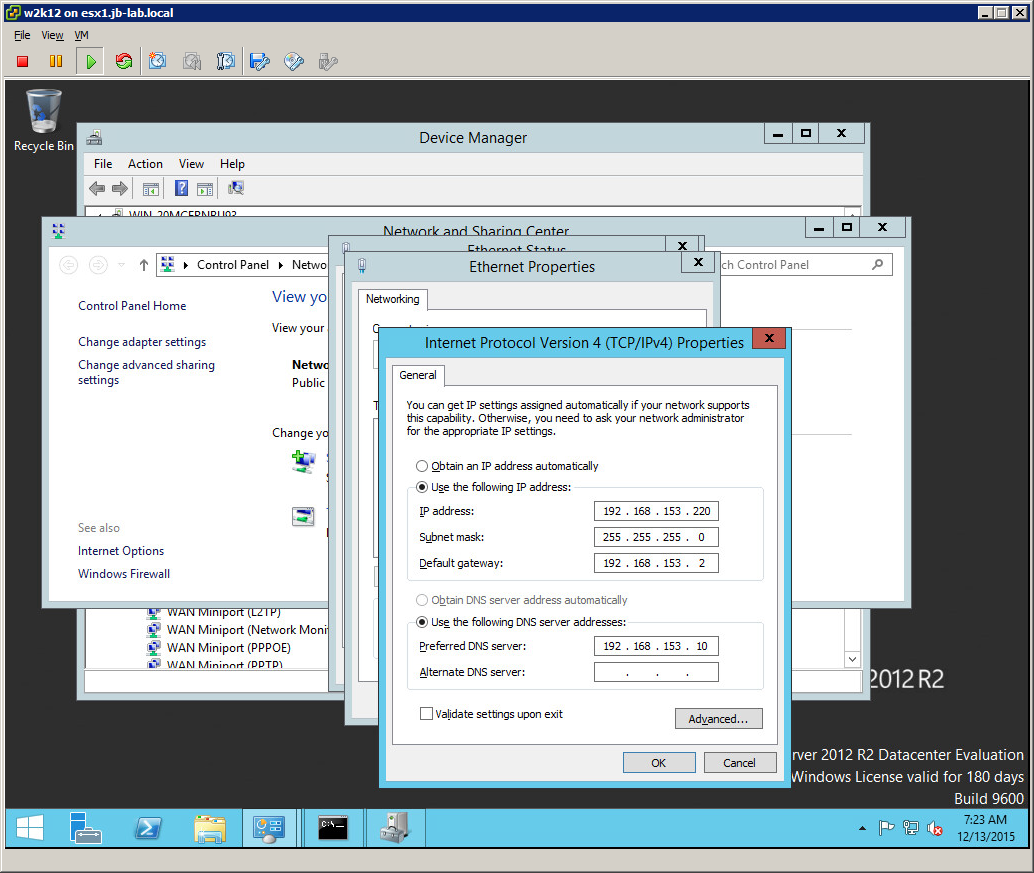
Choose TPC/IPv4 and then click: Properties
Take note of the IP Address, Subnet Mask, Gateway, and DNS
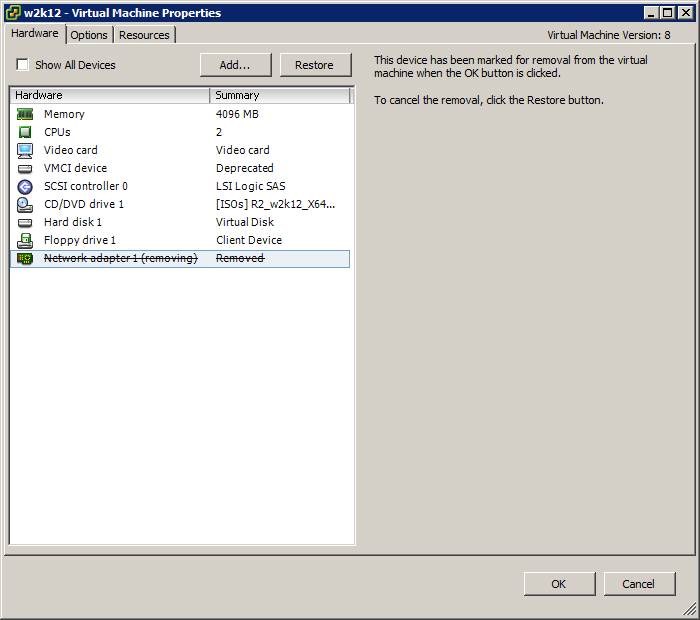
Go to: VM > Edit Settings
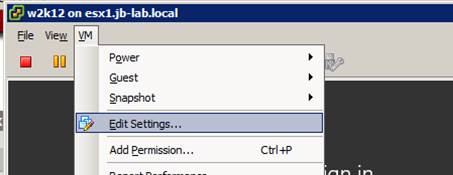
Remove the Network Adapter(s) from the VM and click OK. In truth, you could both remove the old adapter and add the new vmxnet3 adapter simultaneously, but we will do it in separate steps for clarity.
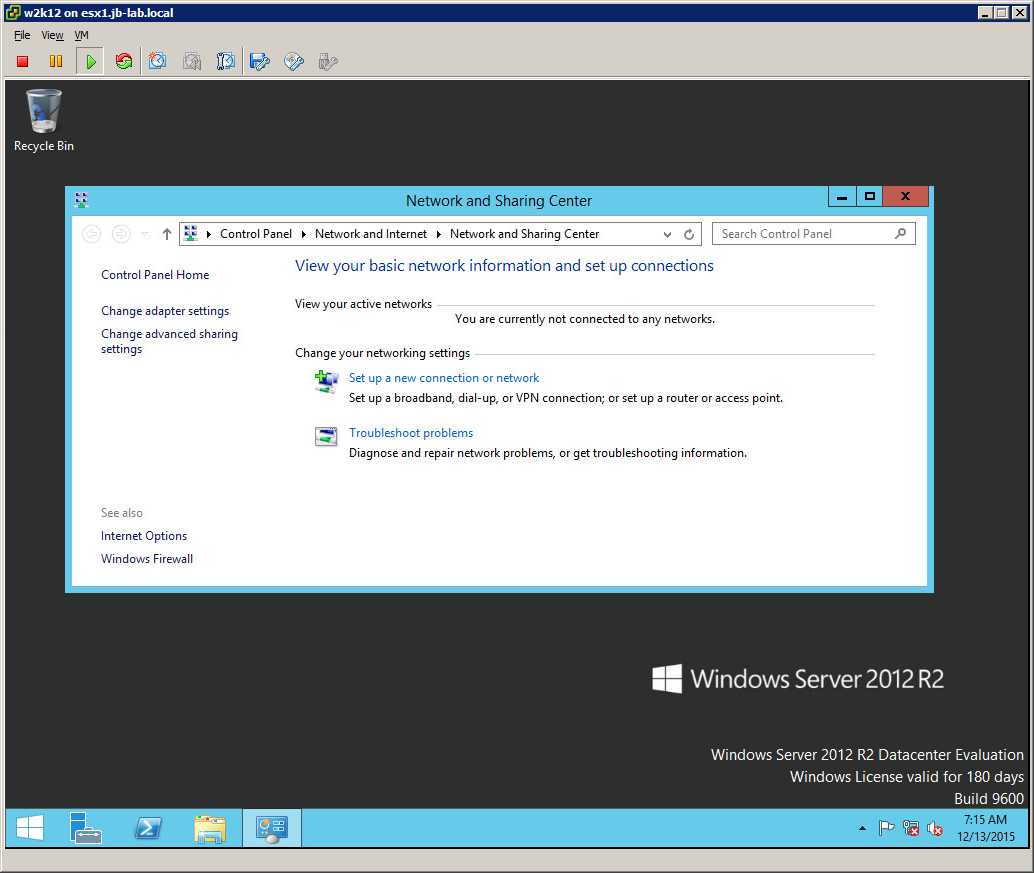
Notice, the active networks list is empty
Although we have removed the device from the VM, we have not removed its configuration from the system. Therefore, the IP address we saw earlier is still assigned to the E1000e Virtual NIC we just removed. In order to cleanly install a Paravirtual NIC, we need to remove the Intel NIC completely.
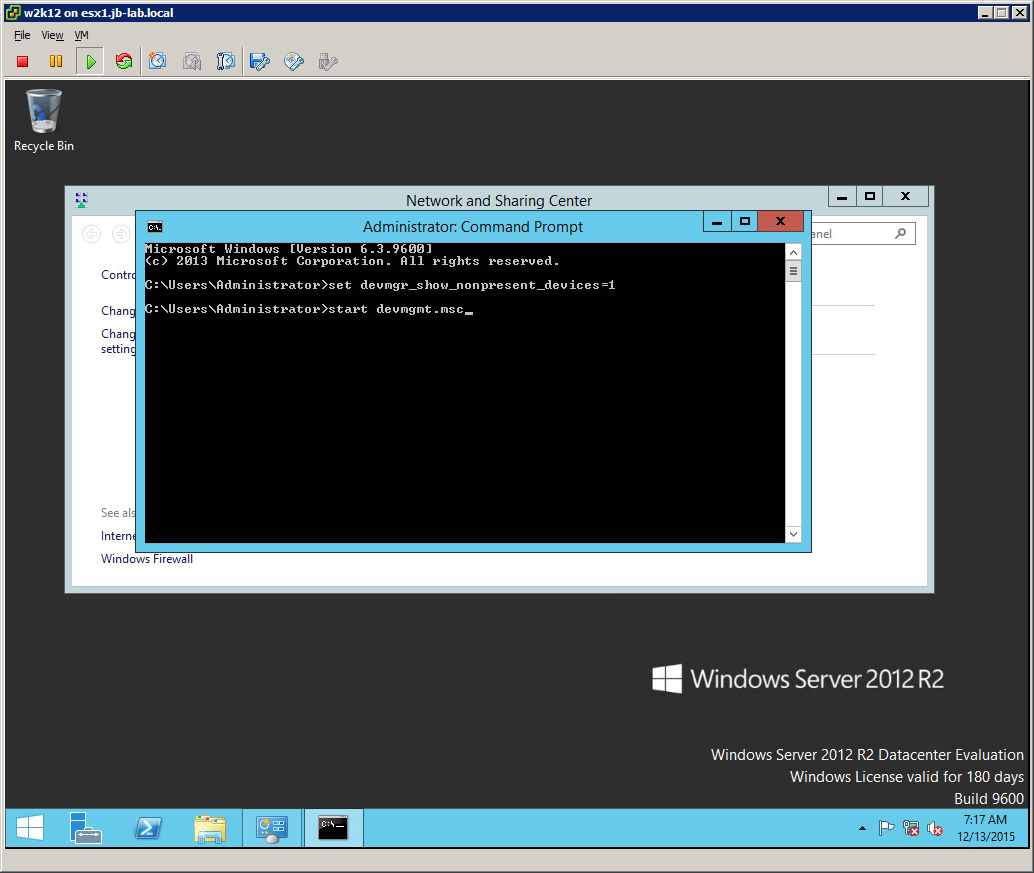
Open a command window (this must be done first from the command window) and run the following commands:
set devmgr_show_nonpresent_devices
start devmgmt.msc
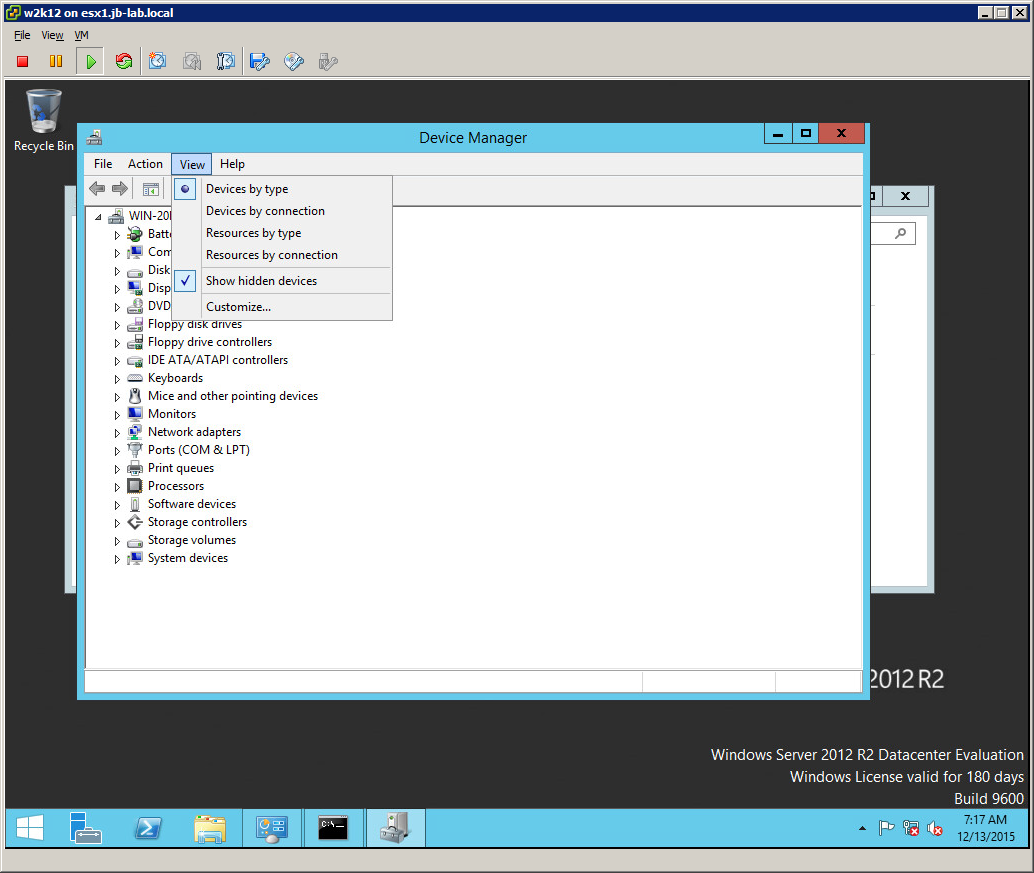
After the device Manager window is open, select: View > Show Hidden Devices
Many admins falsely believe that is is simply enough to show hidden devices, but this is not true. It is absolutely necessary to “show_nonpresent_devices” at the command line first!
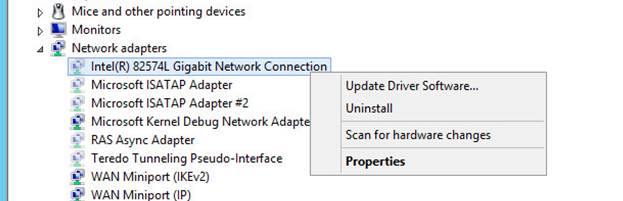
You should now be able to find the (now removed) Intel NIC listed in lighter text than the devices which remain resent.
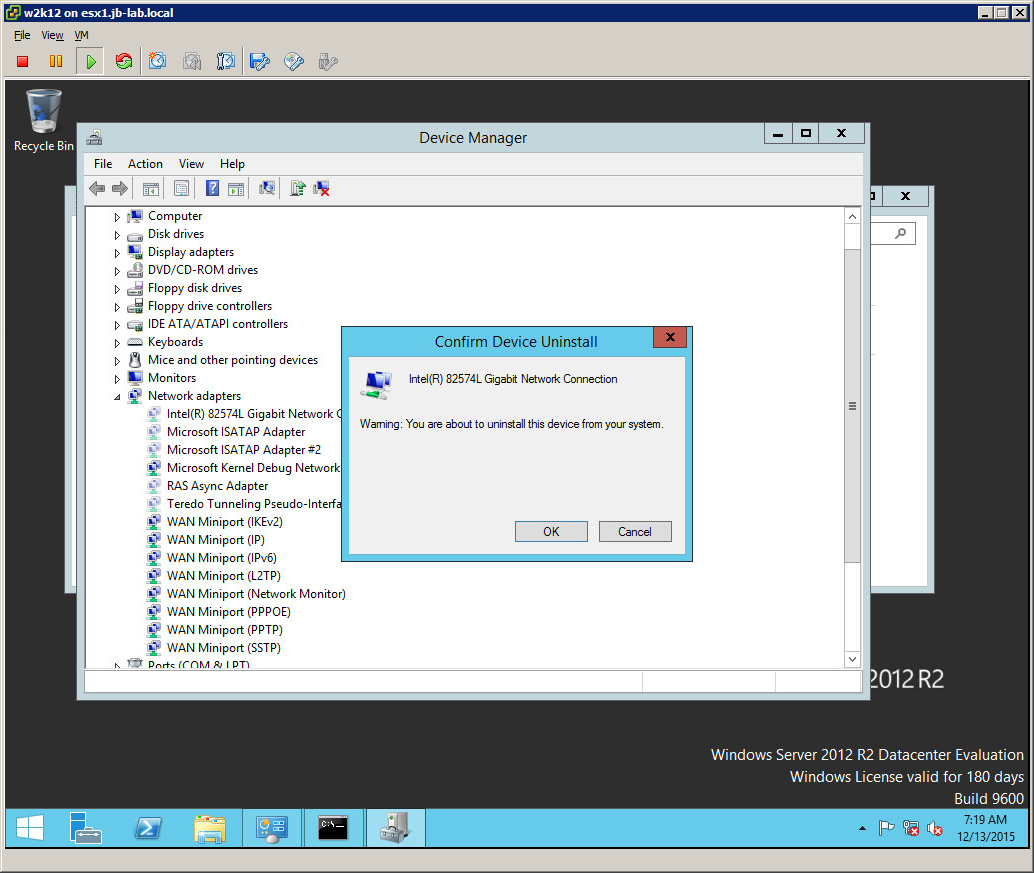
Right-click and select: Uninstall
OK
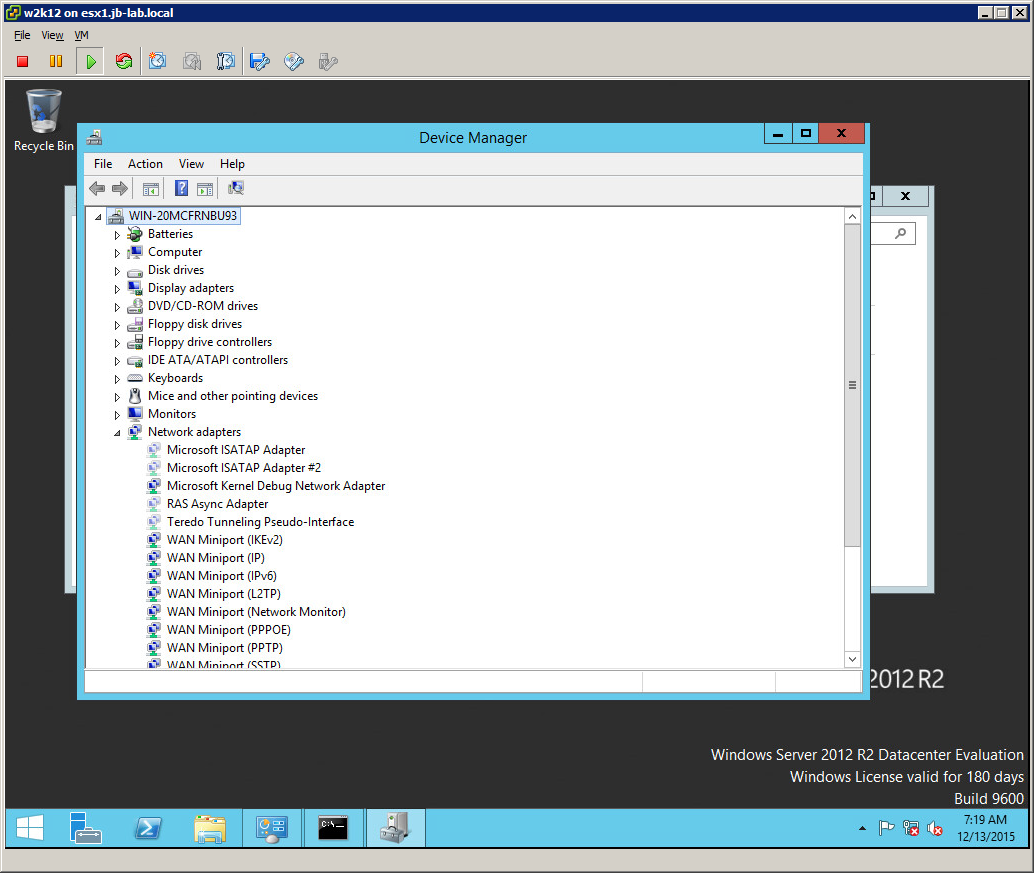
And it’s gone!
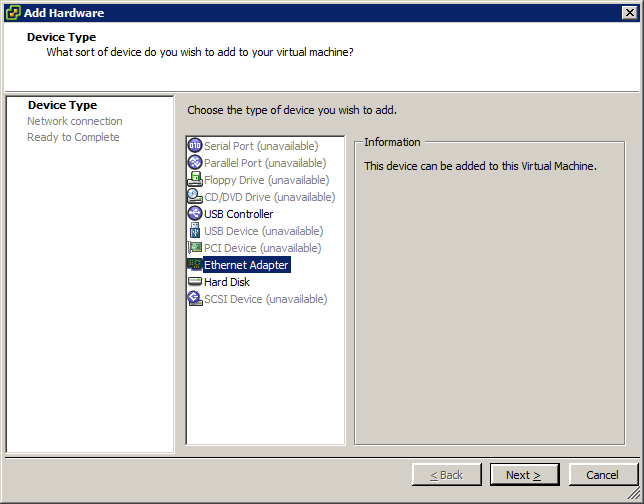
Go to: VM > Edit Settings
Click: Add
Choose: Ethernet Adapter
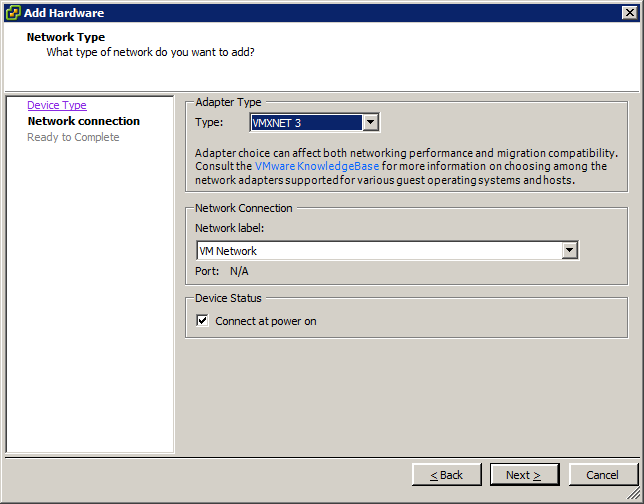
Set the Type to: VMXNET 3 and then choose the appropriate Network Connection (usually VM Network), then click: Next
Click: Finish

Now click: OK
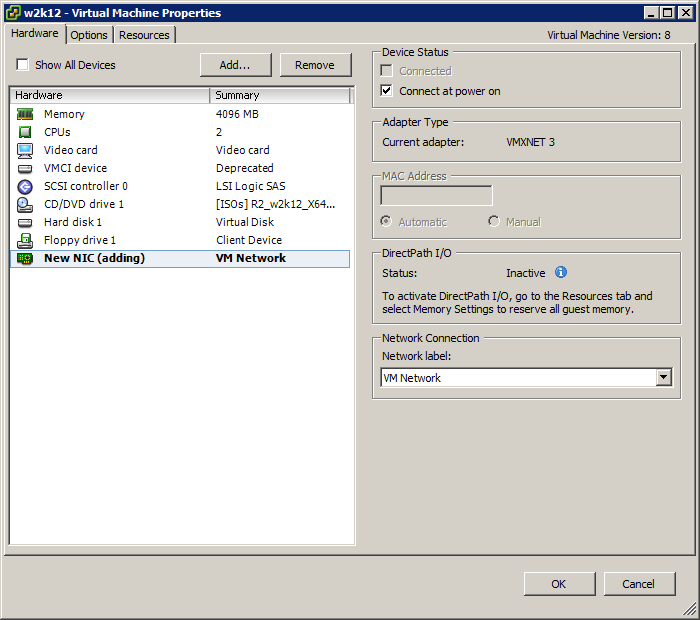
You will see the vmxnet3 Ethernet Adapter added to the Device Manager

Now click the active network, in this case “Ehternet”

Notice the speed listed as 10 Gbps. This does not mean that there are 10 Gbps NICs in the ESXi host merely that the observed speed of the network for this VM is 10 Gbps.
Click on: Properties
Now choose: TCP/IPv4 and select: Properties
Re-assign all of the IP addresses and subnet mask you observed earlier
And you have upgraded to the VMware Paravirtual device VMXNET 3
Upgrading a VM to pvscsi VMware Paravirtual SCSI Adapter
The trick in switching to the VMware Paravirtual SCSI adapter is in adding a dummy disk to the VM, which will force Windows to install the pvscsi driver, included with the VMware Tools package you have installed as part of a separate process.
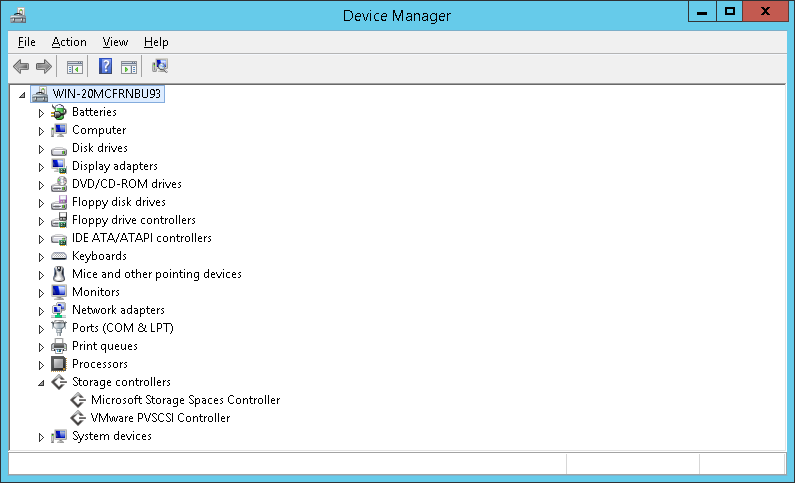
Start the device manager with devmgmt.msc

Observe the LSI Adapter listed under Storage Controllers
Go to: VM > Edit Settings
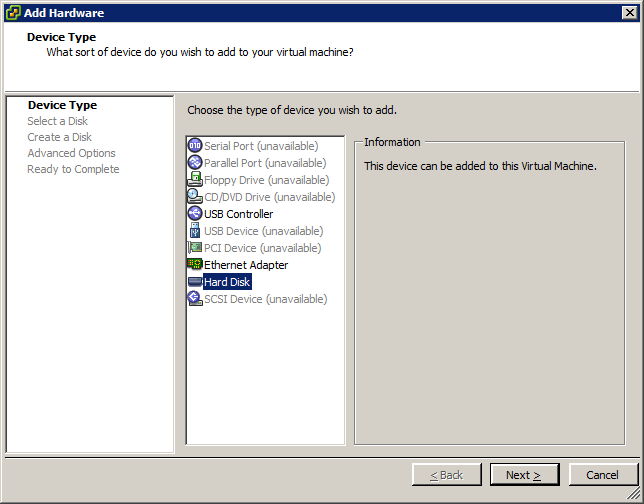
Choose: Add
Select: Hard Disk and then: Next
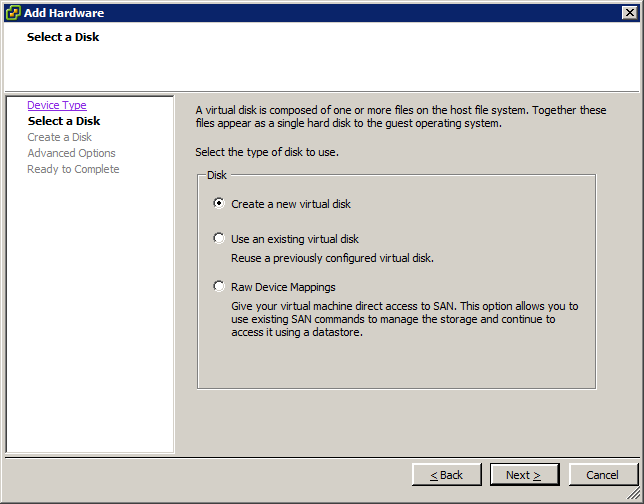
Choose: Create a new virtual disk and then: Next
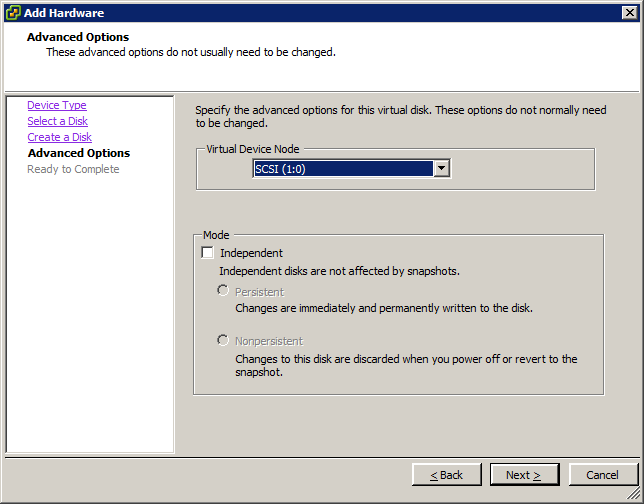
The disk you create can be most any size and provisioning. We choose 10 GB Click: Next
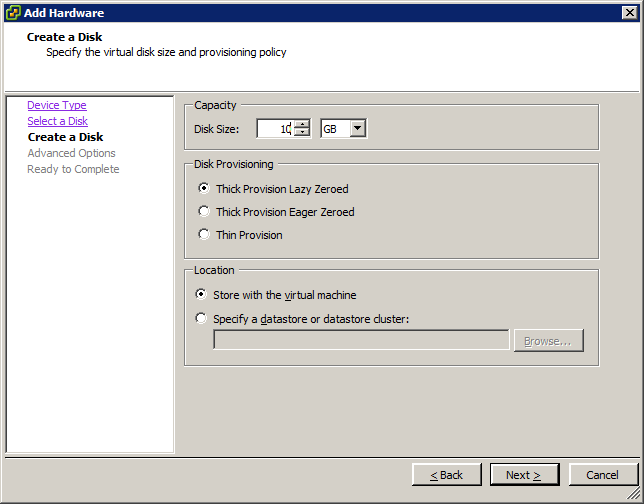
In this step, it is critical that you place the new disk on an unique SCSI Node. That is to say, if the existing disk is on 0:0, then plane the new disk on 1:0 (you must not combine it with any LSI nodes, such as 0:1 or the process will not work)
Now click: Finish
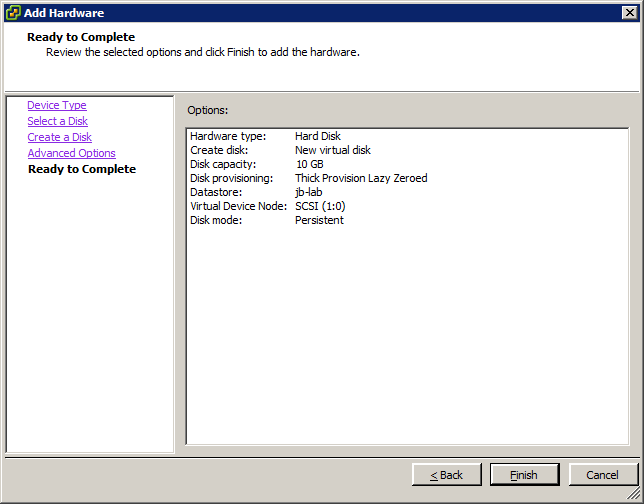
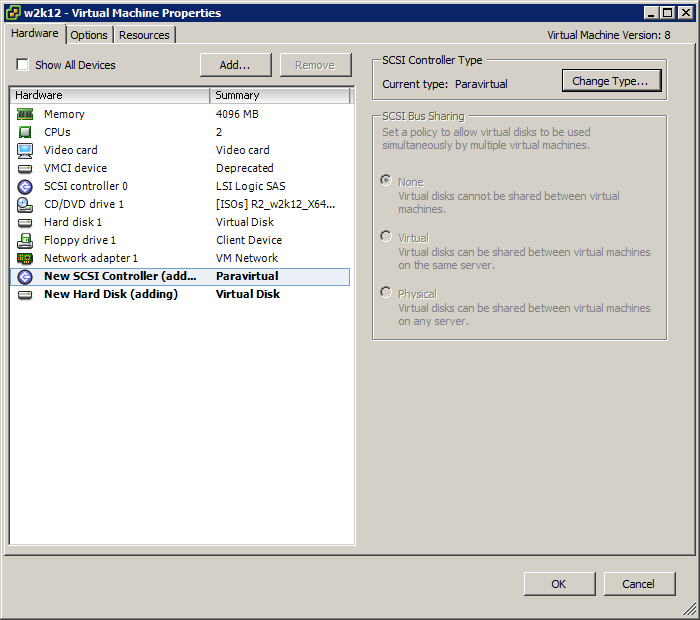
Notice, you have added, not just a disk, but also a New SCSI Controller.
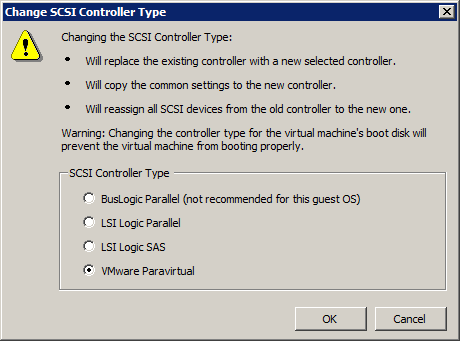
Now click: Change Type

Select: VMware Paravirtual

Now click: OK
Once the disk is added, look again in the Windows Device Manger and make sure that you can see the VMware PVSCSI Controller. If you can, that means the PVSCSI drivers have successfully loaded, and you can proceed.

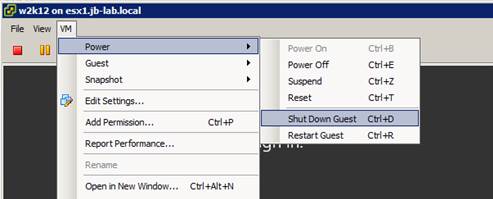
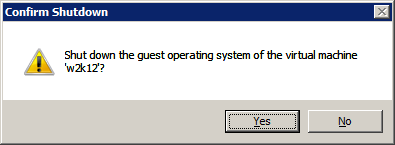
Now we have to shut down the VM.
Once the VM is off, Go to: VM > Edit Settings
Choose the dummy disk (whichever one it was, BE CAREFUL HERE! and click: Remove
Although I failed to do so in creating this demo, you probably want to choose “Remove from virtual machine and delete files from disk,” to avoid leaving orphan files around.
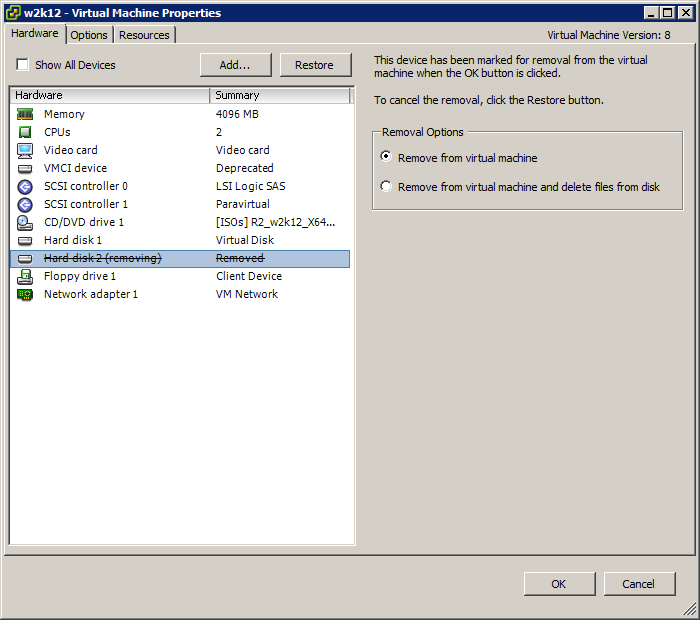
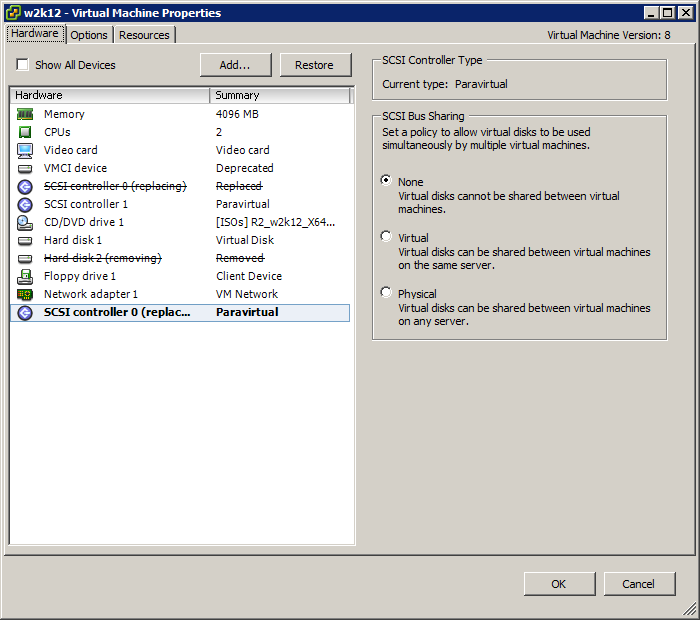
Now select the SCSI controller(s) which are not already Paravirtual and choose: Change Type
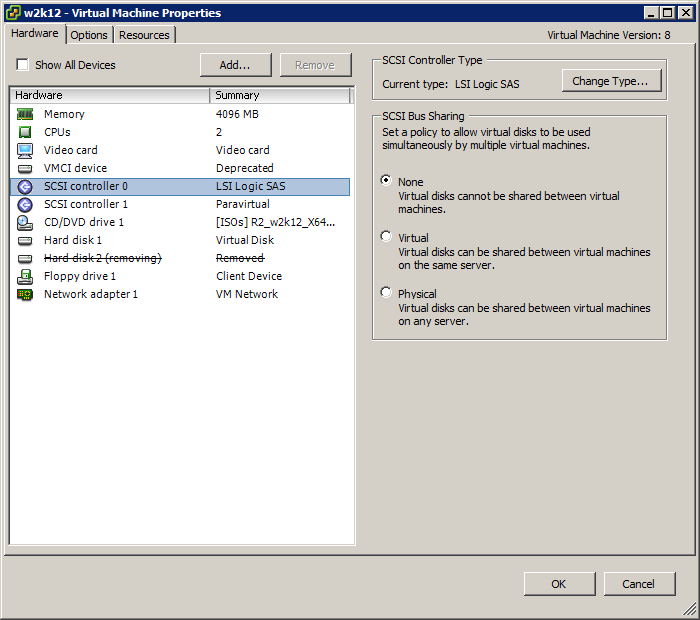
Select: VMware Paravirtual
Now click: OK
Power your VM back on and observe that only the VMware Paravirtual device remains!
It should be noted; just as with the Intel NIC, the LSI device remains as a “nonpresent” device. If you feel like going the extra mile, repeat the steps to show nonpresent devices and uninstall the LSI device!